The first time you see a 1/64 diorama in person — a proper one, not a printed cardboard backdrop — you get it immediately. The cars you’ve been collecting suddenly have a home. The shelf goes from “a row of little cars” to “an actual scene.” And once that happens, you’re in.
But the first purchase is the one people get wrong most. Here’s what to know before you buy — with the actual measurements, because “1/64” means less than most people assume.
The short version
| Decision | What to do | Why |
|---|---|---|
| Which scale | Buy a true 1/64 scene | Mini GT / Inno64 / Tarmac / Kaido House are 6.8–7.4 cm long, under 2.2 cm tall — they fit exactly |
| Which type first | Parking lot or garage | Holds 2–6 cars, works every day, never looks empty |
| Which budget | $40–90 | Below that you get printed cardboard; above that you’re buying footprint, not quality |
| Lighting or not | 5V USB if daily display | Battery lights dim in ~20 hours and are painful to replace |
The scale question is the first thing to get right
Not all 1/64 diecast is the same size. Hot Wheels mainlines are roughly 1/62 to 1/68 depending on the casting. Mini GT, Inno64 and Tarmac Works are true 1/64 — they measure consistently between 6.8cm and 7.4cm long, and under 2.2cm tall.
That 0.6 cm spread sounds trivial until you put a car in an enclosed garage. A 2.4 cm tall Hot Wheels truck will not clear a roof built for a 2.1 cm Mini GT. On an open parking deck it doesn’t matter at all; inside a closed building it’s the difference between “fits” and “wedged.”
Most dioramas are made for true 1/64 cars. If you only collect Hot Wheels mainlines, check the interior clearance before you buy — especially for enclosed garages. Some trucks and wide-body castings won’t fit.
Rule of thumb: if you collect Mini GT, Inno64, Tarmac Works or Kaido House, any diorama labelled “1/64” will fit. If you mix in Hot Wheels, check the bay dimensions first — and when in doubt, pick an open parking scene over a fully enclosed building.

Garage vs parking vs street — which to pick first
Parking / multi-level — Best for displaying 2–6 cars. Practical — you can actually use it every day. A double-level parking workshop runs 29.5 x 19.8 x 12 cm, so it sits on a desk without taking the whole surface. The bigger slope parking lots (40.5 x 30 x 22 cm) hold more cars but need real shelf space.
Garage / repair shop — Best for desk display, single hero car. More detailed, feels like a workshop. Repair shop interiors start small (19.7 x 10 x 10 cm) and scale up to full workshops (29.5 x 20 x 16 cm) with lifts and tool walls.
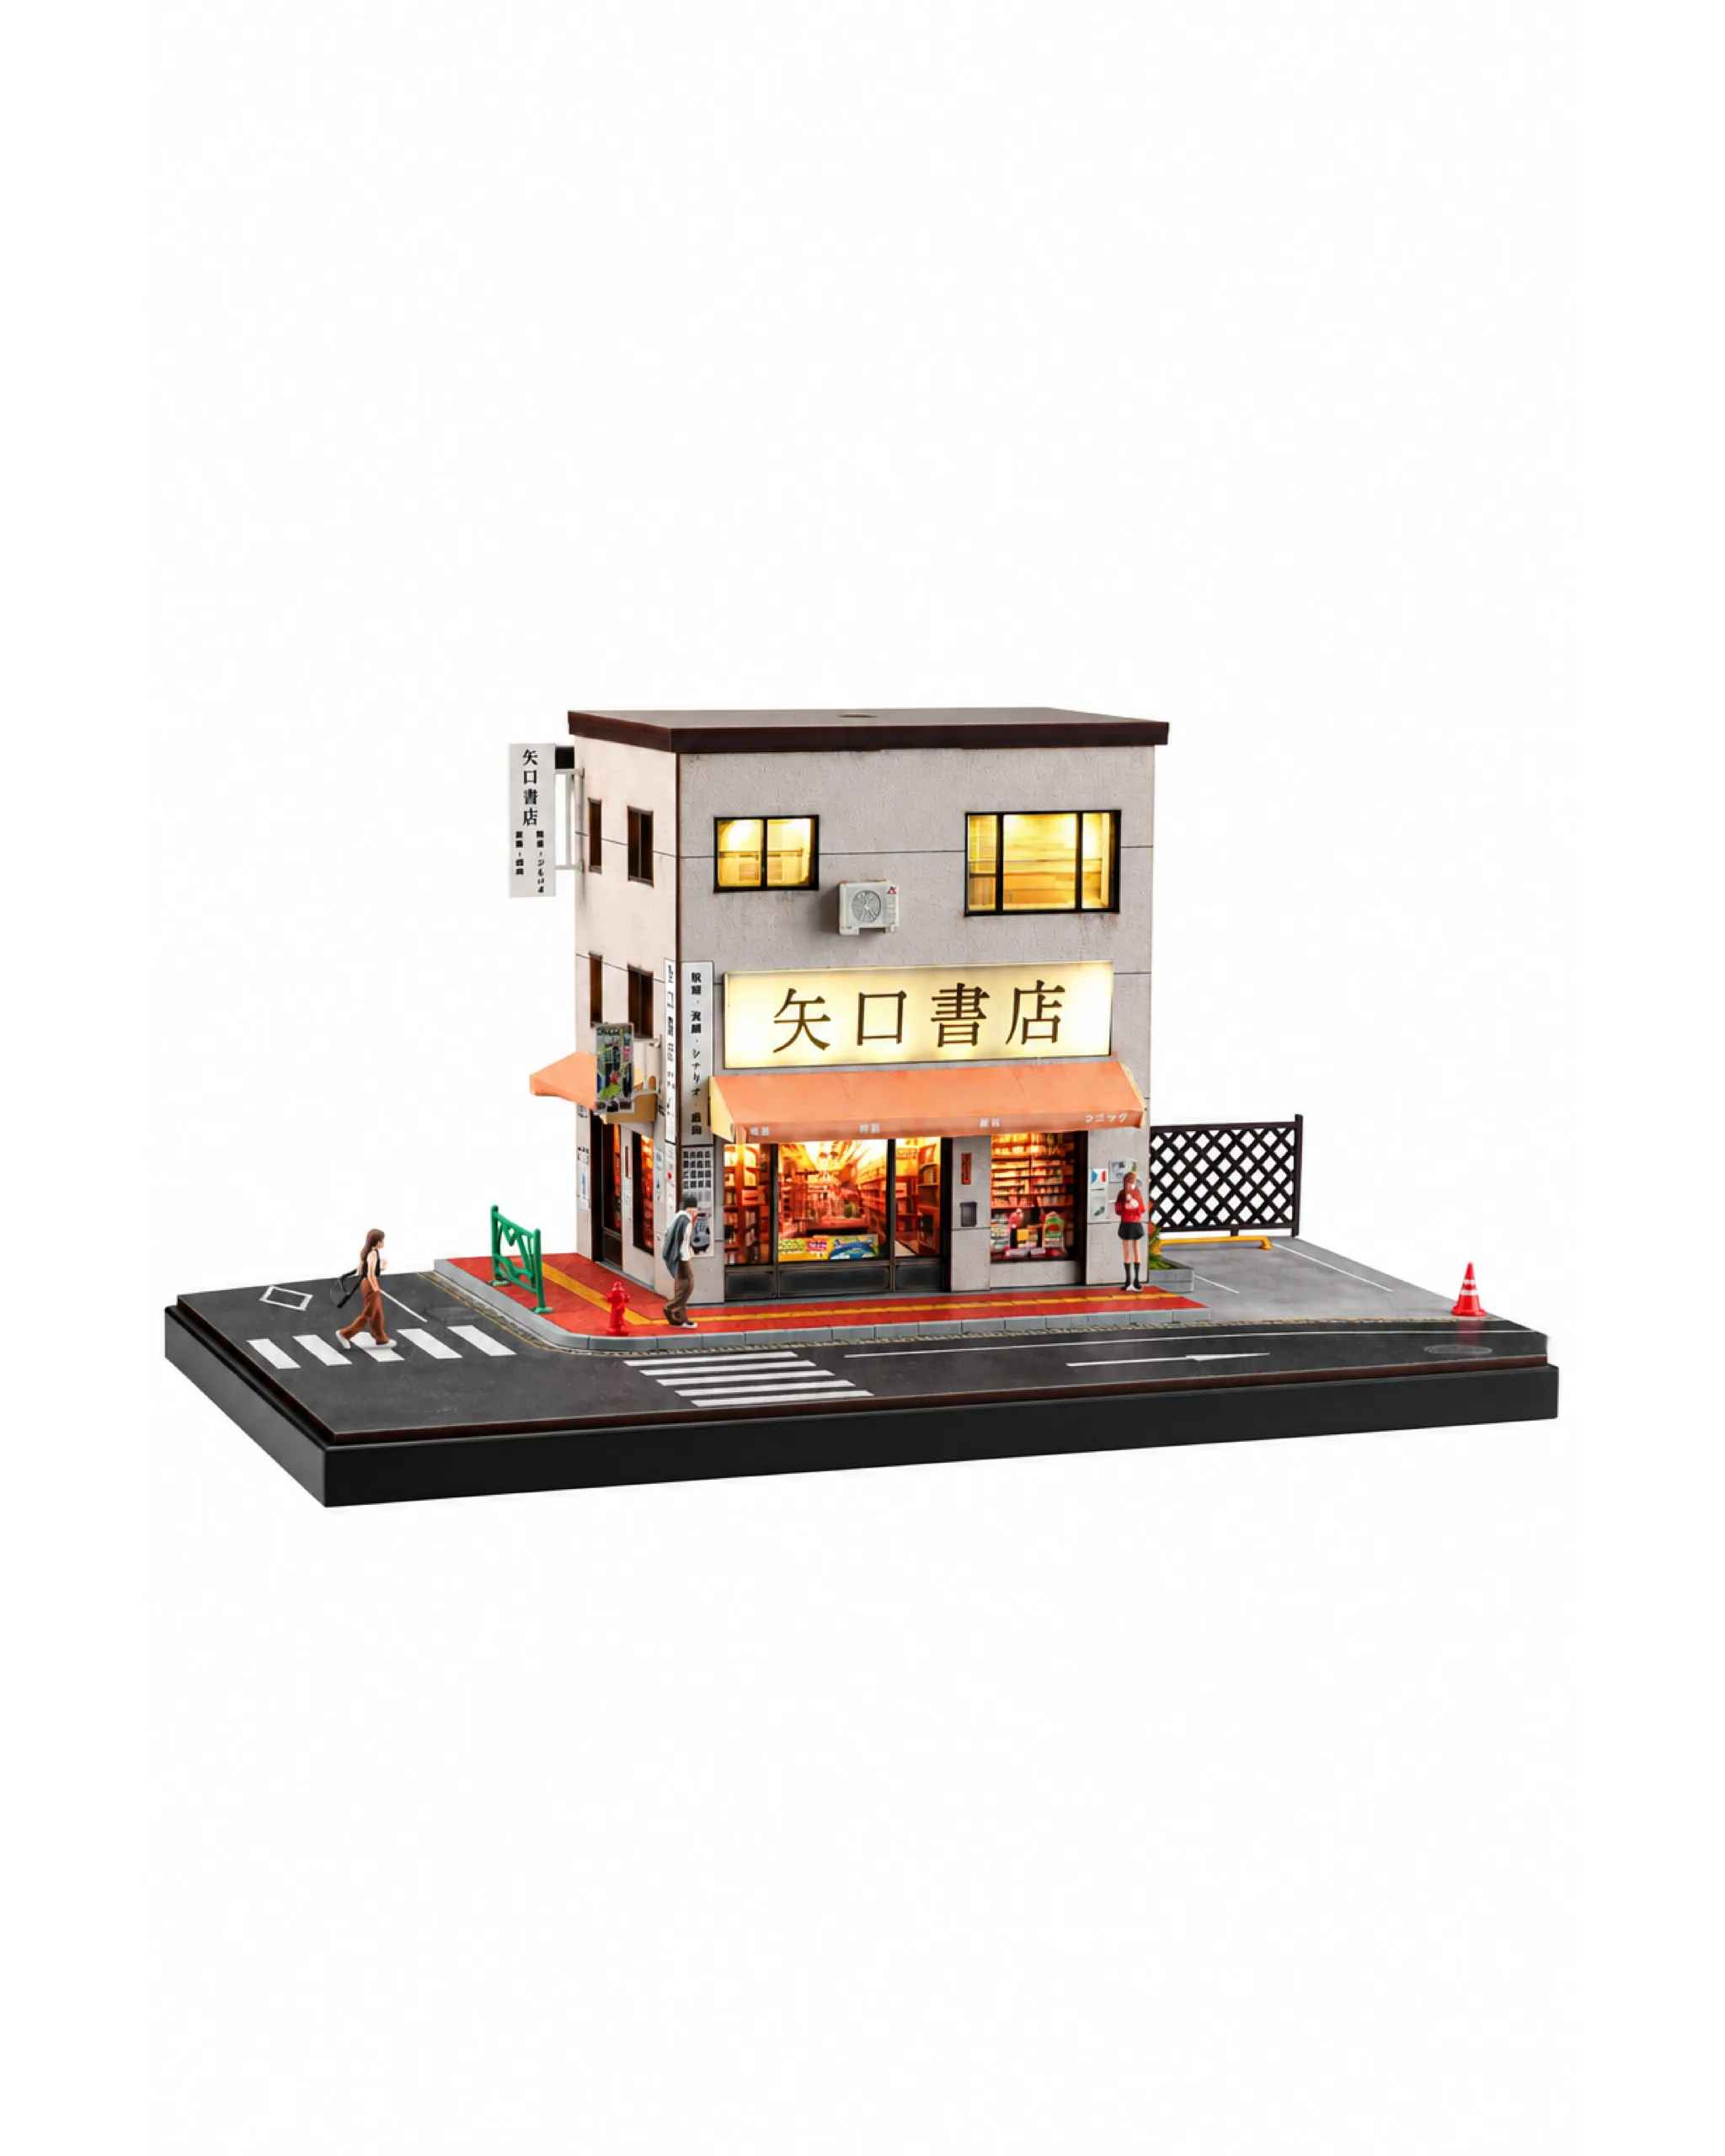
Street / storefront — Best for one-off display, diorama photos. Looks great, but less “functional.” The ramen shop (29.5 x 19.8 x 16 cm) and Lawson storefront (29.7 x 20 x 11 cm) are the classics, and they read instantly even to people who know nothing about diecast.
If you’re not sure, start with a parking or garage scene. They’re the ones you’ll actually use every day — cars go in, cars come out, the scene looks full.
What you get for $40 vs $80 vs $150
| Budget | What you get | Real example |
|---|---|---|
| $40–60 | Single shopfront scenes. One building, one story, good detail. Great as standalone pieces. | Repair Shop Interior — 19.7 x 10 x 10 cm |
| $60–90 | Larger scenes — multi-level parking, bigger street views, corner izakayas. More architectural detail, bigger footprint, better presence on a shelf. | Ramen Shop — 29.5 x 19.8 x 16 cm, 1.3 kg |
| $90–150+ | Complex multi-building scenes, large parking structures, street intersections. Serious display pieces that need dedicated shelf space. | Japanese Slope Parking Lot — 40.5 x 30 x 22 cm |
One thing that isn’t obvious from photos: weight is the tell. A Lawson Convenience Store scene weighs 847 g; the Ramen Shop is 1.3 kg. That mass comes from plastic, resin and fiberboard construction. A printed cardboard backdrop that costs $25 weighs almost nothing, and you can feel the difference the second you pick up the box.

What’s actually in the box
Most ready-made dioramas arrive in a sealed colour box with foam padding and corner protectors. Inside: the scene is usually a single piece or two pieces that slot together. No assembly, no glue, no instructions needed — you open it, put it on the shelf, and that’s it.
Some scenes include small accessories (signs, barriers, props). Some are just the building. Either way, the quality jump over “hand-built from cardboard” is immediate and obvious.
What is not in the box: cars and figures. That’s standard for the hobby — scenes ship bare so you place your own collection in them. If you’re buying your first scene and don’t own 1/64 cars yet, budget for one model alongside it, or the scene will look empty on arrival.

The lighting question
Some dioramas come with 5V USB LED lighting built in. Some don’t. The ones that do look dramatically better on a desk — especially the garage scenes with ceiling-mounted LED strips. A warm 4000K light behind a storefront window changes the whole piece at night.
If you’re buying for daily desk display, get the lit version. Button-cell battery lights are a waste of time for anything you plan to display permanently — they dim within 20 hours and replacing them means taking the scene apart. USB-powered is the way to go, and you can run it straight off a monitor hub or a spare phone charger.
One practical note: scenes with electronics use more materials and cost more. If the budget is tight, lighting is the first feature to sacrifice — an unlit parking structure still looks right. If you’re spending $80+, get the light.
The “do I need figures?” question
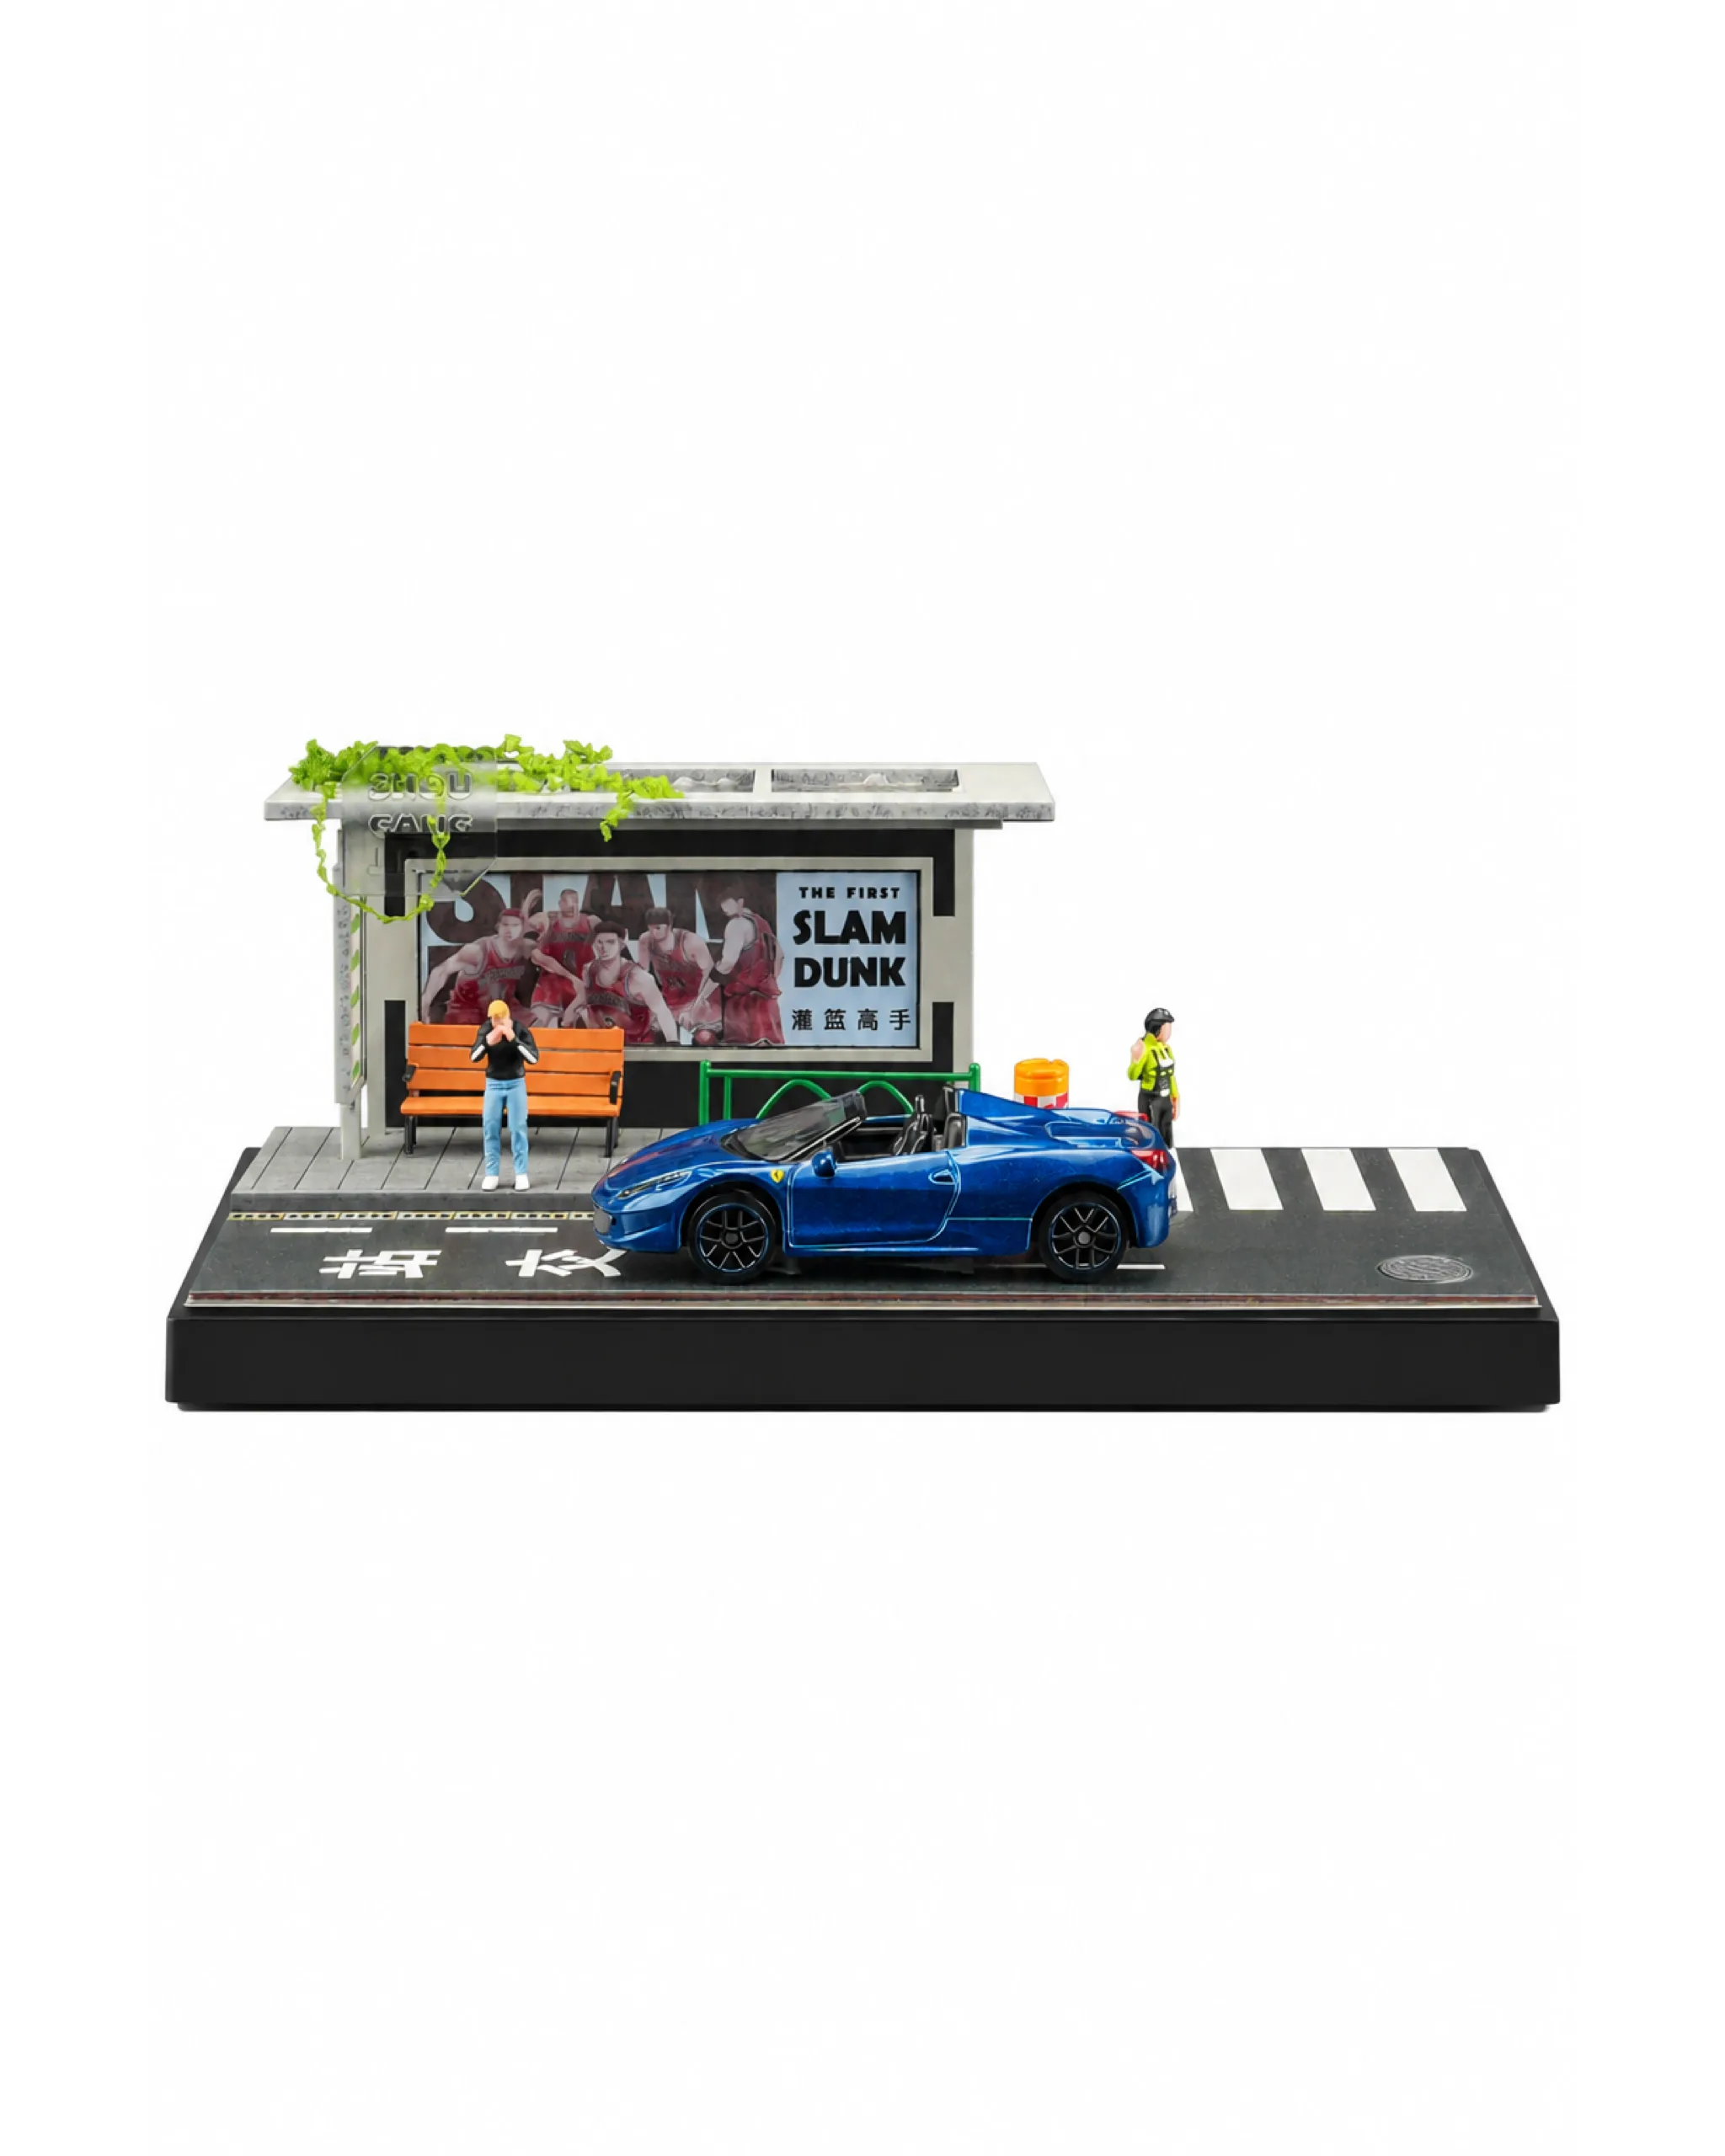
Short answer: not yet. The scenes look complete on their own. Figures add life (and there are great 1/64 scale figures from G-Fans, MoreArt and others) but you don’t need to buy them at the same time as the scene. Start with the scene and a car. Add figures later if you want to.
Where figures genuinely help: street-level scenes with benches, shop counters or station platforms. An empty bus station (19.7 x 10 x 10 cm) reads as a model. The same scene with two figures waiting reads as a place. But that’s a second purchase, not a first one.
How to not waste money on your first buy
- Don’t buy the cheapest thing on a marketplace. “1/64 diorama” on Amazon/AliExpress often means printed cardboard or thin plastic. If the listing has no dimensions and no material list, that’s the tell.
- Don’t buy a scene that doesn’t match your car scale. If you have 1/64 Mini GT, buy a 1/64 diorama. “Universal scale” is not a thing — it means the maker didn’t measure.
- Don’t buy the biggest thing first. Start with one scene you actually like. A 40 cm slope parking lot looks impressive in photos and consumes your entire shelf in reality. If it works, you’ll know what to buy next.
- Do measure your shelf before ordering. A “compact” storefront is still ~29.7 x 20 cm — about the footprint of a hardcover book lying flat, plus 11–16 cm of height. Check the depth of the shelf, not just the width.
- Do buy from somewhere that packs properly. Acrylic and resin break in transit if they’re not boxed correctly. A scene with awnings, signage and thin railings has many snap points; double-boxing with foam corners is what gets it there intact.
Frequently asked questions
Is 1/64 the same as Hot Wheels scale?
Roughly, but not exactly. Hot Wheels mainlines run about 1/62 to 1/68 depending on the casting, while Mini GT, Inno64 and Tarmac Works are true 1/64 — consistently 6.8–7.4 cm long and under 2.2 cm tall. They coexist in the same scenes, but taller Hot Wheels trucks may not clear an enclosed garage roof. Open parking decks have no such problem.
How much should I spend on my first diorama?
$40–60 gets you a single storefront or small interior scene with real materials — enough to see whether the hobby is for you. Below roughly $35 you’re usually buying printed cardboard or thin plastic, which looks flat in person. Above $90 you’re paying for footprint and complexity, which is worth it only once you know you want a large display.
Do I need to assemble anything?
No. Manufacturer-produced scenes arrive ready to display, usually as one piece or two sections that sit together. That’s one of the main practical differences from handmade pieces, which can involve weeks of build time and shipping risk on fragile custom work.
Will a $40 scene look cheap next to an $80 one?
Not in the way you’d expect. The materials are the same across the range — plastic, resin and fiberboard, with similar detail quality. What changes with price is size and architectural complexity, not material grade. A $45 repair shop interior and a $90 parking structure look like they came from the same workshop, because they did.
The one-sentence verdict: start with one $40–60 parking or shopfront scene from a proper manufacturer, add a car you already own, and see if you want more — most people do.